Admin Panel
A no-code machine learning environment for generating predictive insights from process data. Build, train, validate, and deploy predictive models without data science expertise.
You can access the Admin Panel by clicking the Admin Panel icon available in the main navigation bar.
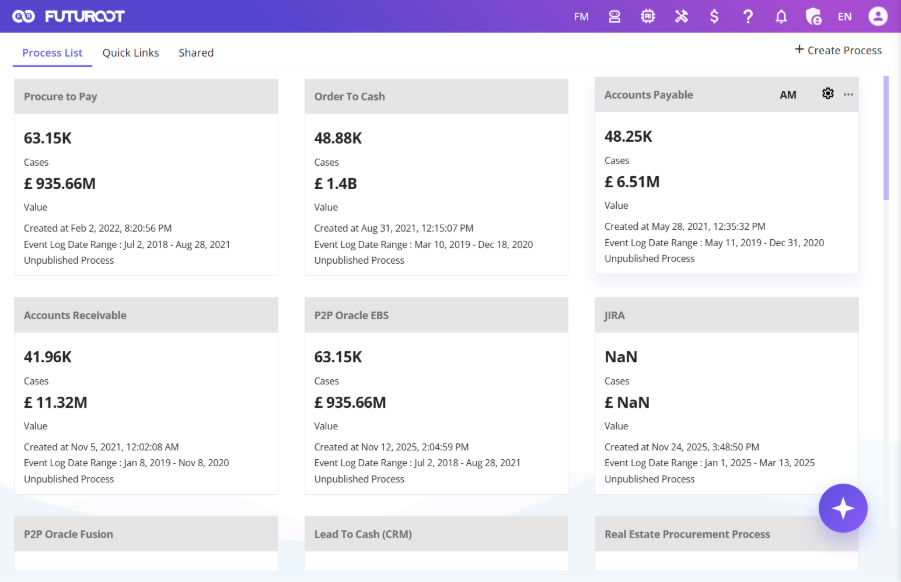
The Admin Panel consists of the following sections:
- Users
- Roles
- License & System Usage
- Logs
- Ownership
Users
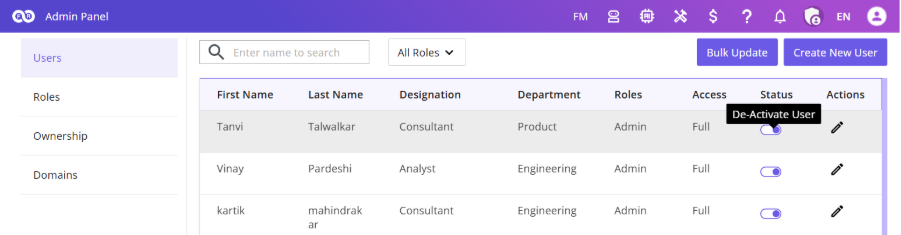
The default landing page of the Admin Panel. View all registered users with: First Name, Last Name, Designation, Department, Roles, Status, and Actions.
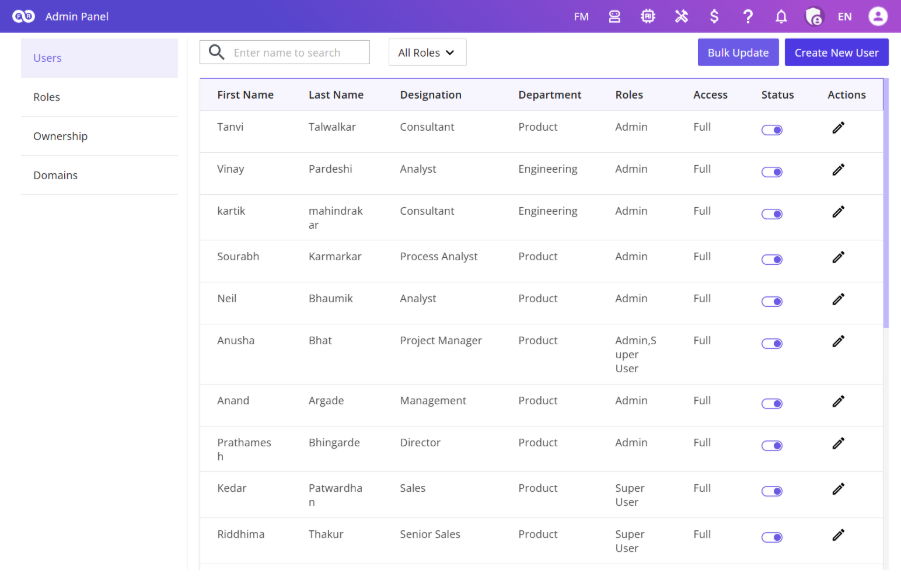
This screen provides a complete view of all users registered within the FUTUROOT environment and allows administrators to manage user access and account information.
User List
The user table displays the following information:
| Column | Description |
|---|---|
| First Name | User’s first name |
| Last Name | User’s last name |
| Designation | User’s job title |
| Department | User’s department |
| Roles | Assigned user roles |
| Status | Active or Inactive |
| Actions | Edit user details |
Each user can be assigned one or more roles, such as: Admin, Super User, Light User & Custom Roles
Search and Filter
To make user management easier, administrators can:
- Search users by name using the search bar.
- Filter users based on assigned roles using the role filter dropdown.
Creating a New User
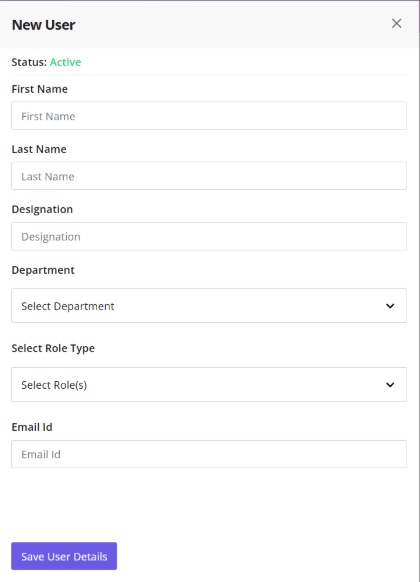
Steps to add a new user:
- Click Create New User.
- A side panel will open.
- Enter the required user details.
- Assign the appropriate role(s).
- Click Save User Details.
Once saved:
- An invitation email is sent to the user’s registered email address.
- The user completes the registration process through the provided link.
- Access to FUTUROOT is granted after successful registration.
Editing User Information
Steps to modify an existing user:
- Click the Edit option under the Actions column.
- Update the required details.
- Click Update User Details.
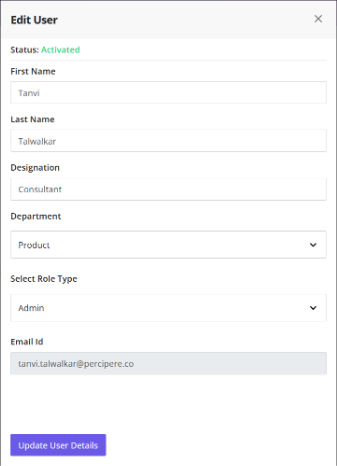
Note: The registered email address cannot be modified.
Activating or Deactivating Users
The Status toggle allows administrators to activate user access or deactivate user access. Deactivated users will no longer be able to access FUTUROOT until reactivated.
Bulk User Management
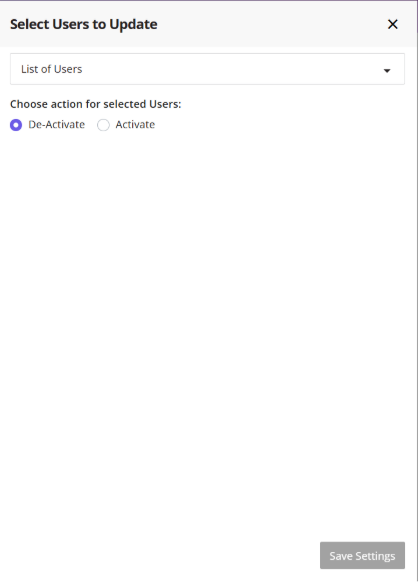
The Bulk Update feature allows administrators to update access for multiple users simultaneously.
Steps to Perform a Bulk Update:
- Click Bulk Update.
- Select one or more users from the List of Users dropdown.
- Choose the required action:
- Activate Access
- Deactivate Access
- Click Save Settings.
ℹ️ The selected event Log cannot be modified after model creation begins.
Roles
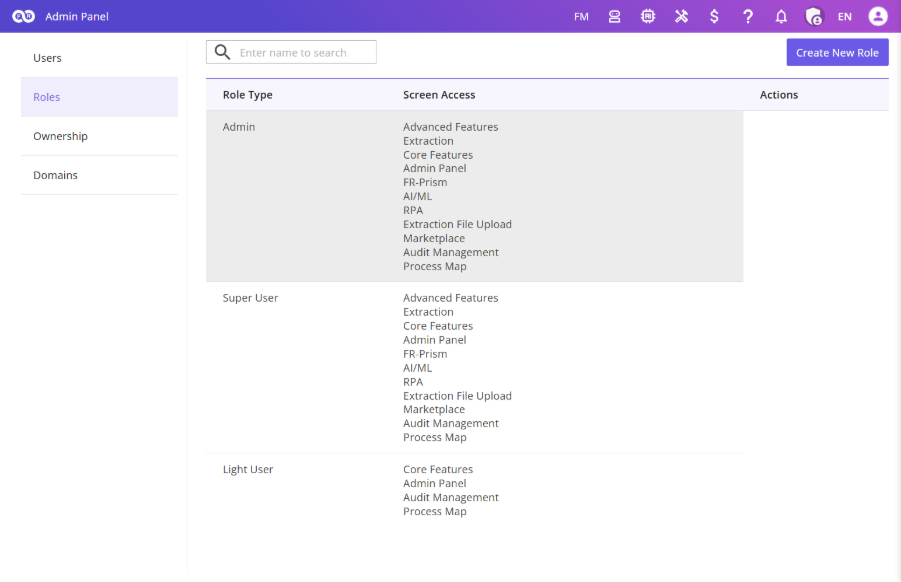
The Roles section allows administrators to create and manage access permissions across FUTUROOT. Roles define which modules and screens users can access.
Default Roles
FUTUROOT provides three predefined system roles:
- Admin
- Super User
- Light User
These roles are system-defined and cannot be edited or deleted.
Role Overview
| Role | Description |
|---|---|
| Admin | Full platform access. Cannot be edited or deleted. |
| Super User | Can view published processes and processes they own. Cannot be edited or deleted. |
| Light User | View-only access. Cannot be edited or deleted. |
Creating a Custom Role
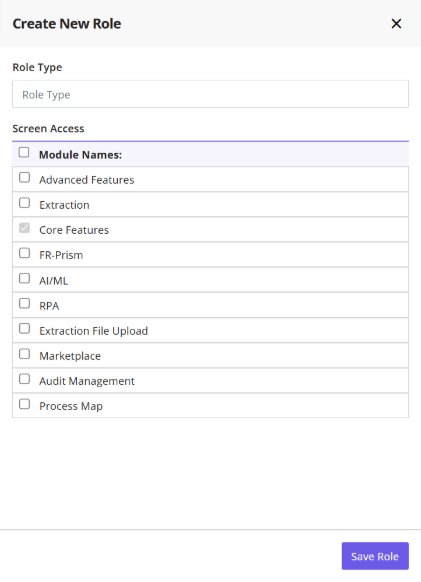
Steps to create a new role:
- Click Create New Role.
- Enter a role name.
- Select the required screen permissions.
- Click Save Role.
The role will be added to the Roles table and can immediately be assigned to users.
⚠️ A role cannot be deleted if users are currently assigned to it. Reassign all users first before deleting a custom role.
Assigning Users to a Role
Steps to assign users to a role:
- Navigate to the Users screen.
- Edit the required user.
- Select the newly created role.
- Save the changes.
Editing a Custom Role
To modify an existing custom role:
- Click Edit under the Actions column.
- Update screen access permissions.
- Click Update Role.
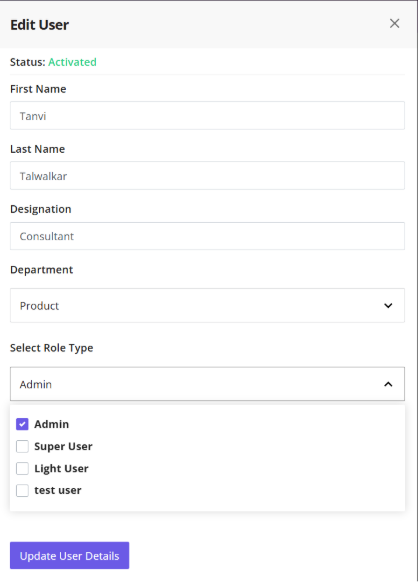
Deleting a Custom Role
Custom roles can be deleted when they are no longer required. A role cannot be deleted if users are currently assigned to it.
Before deleting a role:
- Reassign all users to another role.
- Return to the Roles screen.
- Delete the custom role.
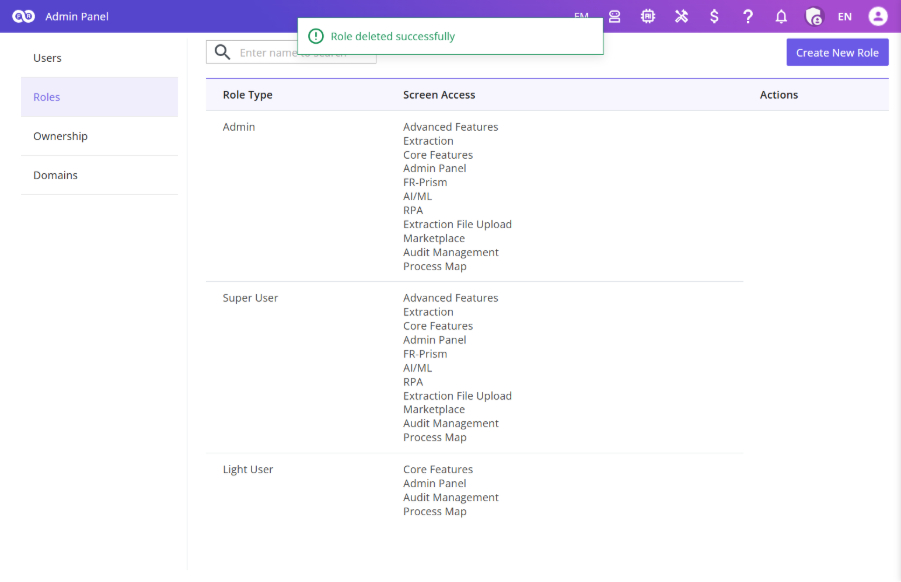
System roles (Admin, Super User, and Light User) cannot be deleted.
License & System Usage
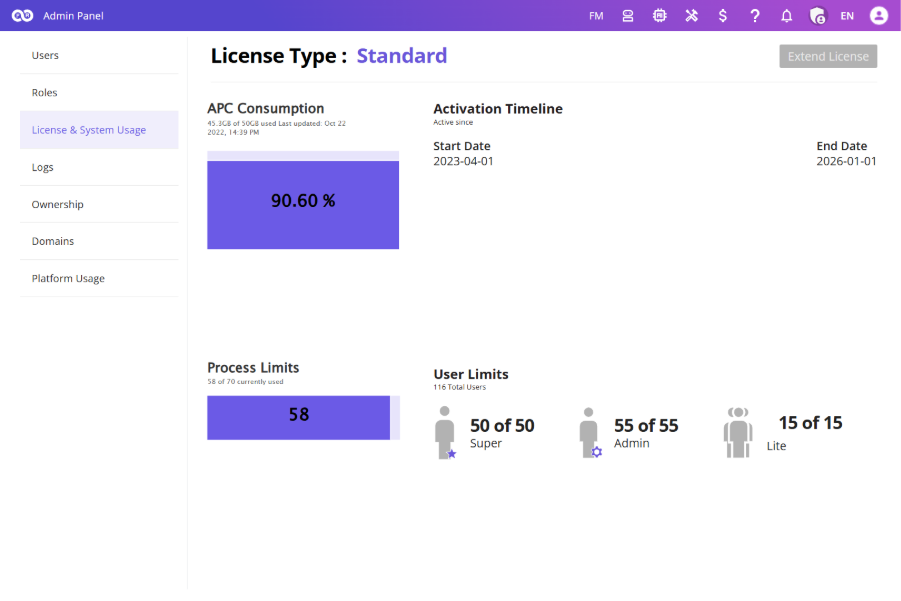
The License & System Usage section provides visibility into your FUTUROOT subscription and overall platform utilization. This helps administrators monitor resource consumption and ensure compliance with licensing limits.
Monitor resource consumption and licensing compliance:
- License Type – Current FUTUROOT license
- APC Consumption – Allocated and utilized storage
- License Timeline – Activation and expiry dates
- Process Usage – Processes created vs. maximum allowed
- User Usage – Admin, Super User, and Light User counts
Accessing License & System Usage
Steps:
- Open the Admin Panel.
- Select License & System Usage.
The dashboard provides a complete overview of system consumption and license statistics.
Extend License
The Extend License feature allows eligible trial users to request an extension of their FUTUROOT license.
Note: This functionality is currently available only in Trial environments.
Remaining Days Indicator
During the final 10 days of your license period:
- A Remaining Days counter becomes visible in the navigation bar.
- A reminder popup appears when you log in.
Requesting a License Extension
When prompted:
- Click Extend License.
- Complete the feedback questionnaire.
- Submit the form.
The questionnaire helps the FUTUROOT team understand your experience and requirements.
Feedback Questionnaire
The questionnaire includes:
- User Interface rating
- Functionality rating
- Performance rating
- Insights quality rating
- Reason for extension request
- Interest in additional training
- Recommendation likelihood
After Submission
Once submitted:
- A confirmation message is displayed.
- The request is sent for review.
- An email notification is sent once a decision is made.
Extension Approval
If approved:
- A new license period is assigned.
- Updated license information becomes visible within FUTUROOT.
- An email confirmation is sent with the revised expiry date.
If rejected or not submitted before expiry:
- Access to the Trial environment will be revoked upon license expiration.
Post-License Expiry Support
After the license expires, users attempting to log in will receive instructions to contact the FUTUROOT Support Team for assistance.
Logs
The Logs section provides a centralized audit trail of activities performed across FUTUROOT. It helps administrators monitor system activity and maintain governance.
Logged Information
| Column | Description |
|---|---|
| User | User who performs the action |
| Process Name | Related Process |
| Object Name | Name of the object |
| Object Type | Type of Object |
| Object Status | Current Status |
| Timestamp | Date and time of activity |
Supported Logged Actions
FUTUROOT currently tracks the following object activities:
- Object Created
- Object Viewed
- Object Updated
- Object Activated
- Object Deactivated
- Object Published
Every action is automatically recorded for auditing and traceability purposes.
Ownership
The Ownership section allows administrators to manage ownership of objects created within FUTUROOT.
This is particularly useful when users leave the organization or when responsibilities need to be reassigned.
Ownership Overview
The Ownership table contains:
| Column | Description |
|---|---|
| First Name | Current owner’s first name |
| Last Name | Current owner’s last name |
| Process Name | Related Process |
| Object Name | Name of the object |
| Object Type | Type of Object |
| Object Status | Current Status |
| Timestamp | Date and time of activity |
| Actions | Assign or Delete |
Reassigning Ownership
To transfer ownership:
- Click Assign under the Actions column.
- Select a new owner from the user list.
- Choose one of the following options:
A. Transfer only the selected object
B. Transfer all objects of the same type - Click Assign.
Ownership is immediately transferred to the selected user.
Deleting Objects
Administrators can permanently remove objects when they are no longer required.
To delete an object:
- Click Delete under the Actions column.
- Confirm the action
The selected object will be removed from the system. Use caution when deleting objects, as this action may impact associated processes, dashboards, reports, or configurations.